
1. Kinematic Mechanics of the eSP Variator Assembly
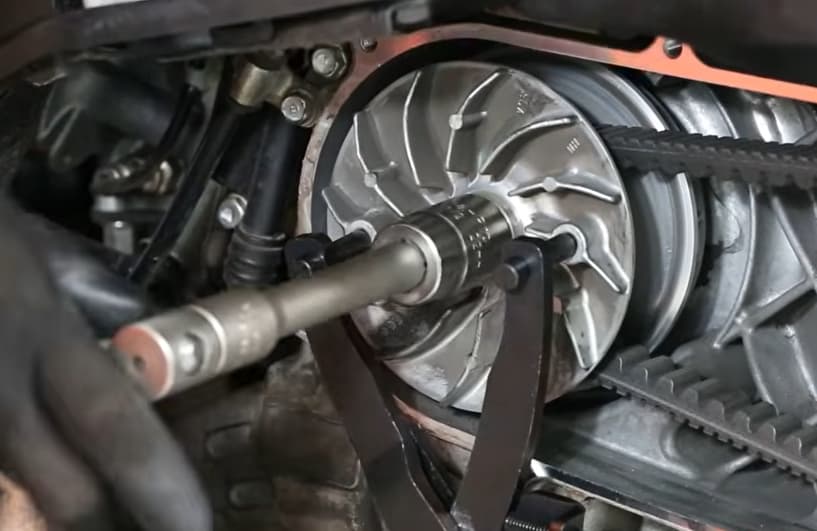
The primary drive side of the Honda eSP Continuously Variable Transmission (CVT) consists of a fixed drive face, a movable drive face housing six roller weights, a ramp plate with three rubber slide shoes, and a central drive boss sliding on the hardened steel stub of the crankshaft. Power transmission relies on static friction generated by axial clamping force across the crankshaft stack.
When the M12 x 1.25 flanged nut on the left-hand crankshaft snout is torqued to its exact factory specification of 59 Nm (44 lbf·ft) for PCX 150 / ADV 150 (or 55 Nm on early PCX 125 variants), it exerts over 18,000 Newtons of axial tension along the crankshaft stub. This clamping pressure locks the inner race of the starter drive gear, the variator ramp plate, the drive boss, and the outer fixed drive face into a single rigid rotating assembly.
The Impact Gun Destruction Mechanism:
When an untrained operator uses an uncalibrated pneumatic or cordless impact wrench to tighten the variator nut, two destructive phenomena take place:
- Pinching the Drive Belt: If the rear driven pulley is not hand-compressed to allow the V-belt to drop deep into the rear sheaves, the belt remains wedged between the front drive faces. As the front nut is spun tight with an impact gun, the nut clamps against the rubber belt rather than metal-to-metal against the drive boss. Once the engine starts and rotates, the belt moves outward, leaving 1 to 2 mm of axial play in the variator stack.
- Micro-Fretting & Spline Shearing: With axial clamping force lost, the splined steel drive face is no longer clamped tightly against the step shoulder of the crankshaft. Under engine acceleration and engine braking cycles, the drive face wobbles back and forth on the splines. This high-frequency impact rapidly micro-frets the soft external splines of the crankshaft, rounding off the teeth within 50 to 200 miles of operation.
2. Honda eSP & 150cc Platform OEM Torque Matrix
To eliminate maintenance rework and uphold Lean industrial quality standards, service technicians must strictly adhere to verified Honda factory torque limits. The table below details critical primary and secondary CVT fastener specifications:
| Model Platform | Fastener Location | Thread Size & Pitch | OEM Torque (Nm) | OEM Torque (lbf·ft) | Required Tool / Holder |
|---|---|---|---|---|---|
| Honda PCX 150 (2013-2021) | Front Variator Drive Nut | M12 x 1.25 Flange Nut | 59 Nm | 44 lbf·ft | Universal Flywheel Holder (OEM 07725-0010000) |
| Honda ADV 150 (2021-2023) | Front Variator Drive Nut | M12 x 1.25 Flange Nut | 59 Nm | 44 lbf·ft | Universal Flywheel Holder / Pin Spanner |
| Honda PCX 125 (2010-2012) | Front Variator Drive Nut | M12 x 1.25 Flange Nut | 55 Nm | 41 lbf·ft | Universal Flywheel Holder |
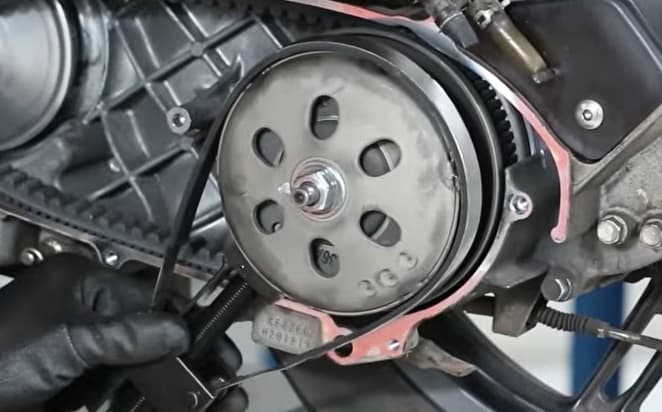
| Honda PCX 150 / ADV 150 | Rear Clutch Bell Nut | M12 x 1.25 Flange Nut | 49 Nm | 36 lbf·ft | Pin Spanner Wrench (Hold Bell Holes) |
| Honda PCX 150 / ADV 150 | CVT Outer Cover Bolts | M6 x 1.0 (8mm Head) | 10 Nm | 7.4 lbf·ft | 8mm Socket in Criss-Cross Pattern |
Cross-check these values with our dedicated master guides, including the Honda PCX 150 Master Maintenance Guide, Honda PCX 125 Guide, and Honda ADV 150 Torque Guide.
3. Zero-Defect Variator Reassembly Protocol
Implementing a Lean zero-defect assembly procedure guarantees that the drive belt is never pinched and full axial clamping force is delivered to the crankshaft stack.
Standard Operating Procedure (SOP):
- Spline & Shaft Cleaning: Thoroughly clean the crankshaft splines using a brass wire brush and aerosol contact cleaner. Remove all accumulated rubber dust, old grease, and rust particles. Inspect spline flanks for pitting or step wear.
- Bushing Lubrication: Apply a ultra-thin film (less than 0.1 gram) of high-temperature polyurea grease to the internal bore of the movable drive face boss. Wipe away any excess grease that could migrate onto the belt pulley faces.
- Roller Weight Orientation: Install six OEM roller weights (20 x 15 mm, 17.0 gram stock weight for PCX 150). Ensure the non-metallic closed stopper side of each roller faces counter-clockwise into the ramp pocket to absorb rotational thrust during engine acceleration.
- Spreading the Rear Driven Sheaves: Before fitting the front fixed drive face, grip the rear clutch assembly with both hands and firmly pull the movable driven face toward the clutch bell while compressing the large internal torque spring. Push the V-belt deep into the bottom of the rear pulley sheaves. This provides 30 to 40 mm of belt slack at the front crankshaft end.
- Hand-Threading & Alignment: Slide the front fixed drive face onto the crankshaft splines. Verify by visual inspection and touch that the outer drive face splines pass completely over the crankshaft splines and rest flush against the drive boss, with 2 to 3 thread pitches of the crankshaft exposed. Thread the M12 flange nut by hand for at least 4 full turns to prevent cross-threading.
- Torque Verification: Engage the pin holder tool into the cooling fins or holes of the drive face. Apply a calibrated torque wrench set to 59 Nm in a smooth, continuous pull until the wrench clicks. Turn the engine over by hand 360 degrees to verify that the belt travels freely without binding.
4. Precision Wear Limits & Caliper Inspection Standards
Industrial preventative maintenance relies on objective wear measurements rather than subjective visual checks. Use digital calipers and micrometers to audit CVT components against factory service limits:
| Component Part | OEM Standard Dimension | Service Wear Limit (Replace) | Measurement Tool Required |
|---|---|---|---|
| Drive Belt Width (PCX 150) | 22.5 mm (0.886 in) | 21.5 mm (0.846 in) | Digital Vernier Caliper (3-point check) |
| Movable Face Bushing I.D. | 27.000 - 27.021 mm | 27.060 mm | Telescoping Gauge & Micrometer |
| Drive Boss Outer Diameter | 26.974 - 26.989 mm | 26.950 mm | Outside Digital Micrometer (0-25mm) |
| Roller Weight Outer Diameter | 20.00 mm (0.787 in) | 19.50 mm (0.768 in) | Digital Caliper (Check for flat spots) |
| Clutch Lining Thickness | 4.0 mm (0.157 in) | 2.0 mm (0.079 in) | Depth Micrometer / Caliper Blade |
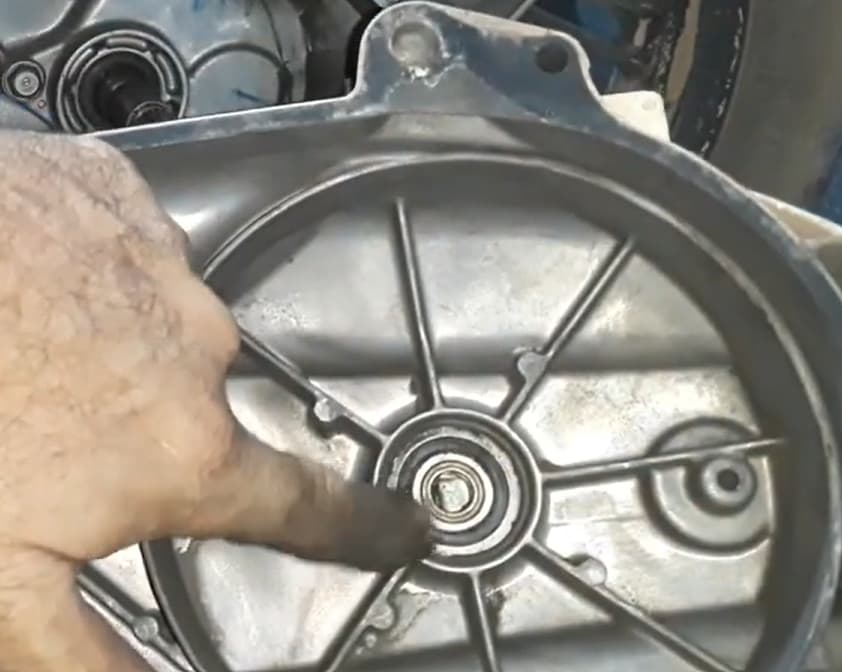
By enforcing these precision tolerances and adopting structured torque control, technicians eliminate unexpected drivetrain failures, preserve expensive OEM crankshaft assemblies, and deliver factory-certified reliability on every Honda 150cc scooter service.

About the Author: Gregório
Industrial Administrator & Lean Manufacturing Consultant. Technology enthusiast passionate about bridging industrial process engineering with technical publishing. With a background in waste elimination, standardized specifications, and zero-rework quality control, Gregório curates the Motor Scooter Parts technical database to provide mechanics and DIY riders with field-tested OEM torque tolerances and precision diagnostic standards.